It is well-established that Hyperledger Fabric is the best open-source framework for private and permissioned blockchain networks. In the first part of this blog, we discussed all the crucial considerations before deploying the Hyperledger Fabric to the blockchain network, and in this (part 2) article, we will discuss how to set up components.
Starting with setting up CA, followed by how to create MSPs, and an overview of all the consecutive steps are shared below.
Remember that this is an overview of how to set up components for the Hyperledger Fabric blockchain network, not a detailed explanation for a production network deployment. Albeit, a few primary codes & commands are shared to help you understand the process more easily.
The following steps can be developed with the help of an hlf-operator or a Helm Chart, as depicted in part 1 of this write-up.
So, without further ado, let’s get started.
Setting Up Certificate Authority (CA)
Before setting up components, keep the Helm Chart prerequisites ready in the initial bootstrapping step. The prerequisites usually are some configmaps, and some Kubernetes secrets available in the cluster namespaces.
Next, set up a CA server to create MSPs, and it is recommended to deploy two CAs at the least.
One would be for enrollment purposes, and the other for TLS certifications. In this, the former is used to generate enrollment identities for nodes, org, users, and others. The TLS CA will give out TLS certificates to establish secure communications between components.
The Fabric CA server database stores the registered users, and the helm chart is configured to use an in-memory sqlite3 database. If you wish to use an external database, you must configure it in the values.yaml of the hlf-ca chart.
Find more details about setting up CA and MSPs by visiting the official Fabric documentation.
Use this CA to Create Identities & MSPs.
After setting up the CA, you can generate certificates for identities and Membership Service Providers (MSPs) using the fabric-ca-client CLI command. This command allows you to interact with the CA server to register, enroll ids, revoke certificates, etc.
As there are multiple organizations and components for every organization, you will have to run similar commands time & again to create MSPS. You may automate this task using shell scripts and place it in a ca-client Helm Chart.
This would be an ideal time to move the certificates to the external storage if you take the external storage route.
Visit Identity and Membership Service Provider (MSP) for more information on identities and permission in the Fabric-based blockchain network.
The next step is choosing either LevelDB or CouchDB. It’s established how Peer nodes use either LevelDB or CouchDB to store ledger data in part 1. CouchDB is the way to go if your instance demands rich query operations on ledger data, so start CouchDB before starting the peer node for ease of configuration.
Generating Genesis Block
In the latest Fabric version, v2.4, system channels are optional, and it does not need to be added to the system channel genesis block in the node configuration. Rather, you can start generating a genesis block directly for the application channel.
If you are still using Fabric v2.2, having an ordered system channel is necessary. The orderer system channel has the list of organizations that have permission to create channels, and orderer admins maintain this. The channel’s genesis block should be included while configuring the node before starting the orderer node.
You can use the following command to generate genesis blocks, and check out this link for more details on generating genesis blocks.
Make sure Kafka brokers are set correctly in configtx.yaml
Here’s a sample config.tx file link.
configtxgen -profile TwoOrgsOrdererGenesis -outputBlock genesis.blockDeploy Peers and Orderer Nodes
Once you obtain the MSPs and certificates, you can deploy nodes, but first, you must customize your config files. Core.yaml and orderer.yaml are the configuration files for peers and orderer nodes, respectively, and click this link for the Fabric sample config directory.
Once these two config files and the deployment backend are ready, you can install the Helm Chart in your cluster and start the orderer and peer nodes.
Join Channel
Next, both the nodes must join the participating orgs, and Orderers may join with osnadmin binary. This channel enables admins to undertake operations on the orderer, like joining, removing, and listing the channel when an orderer enters. The admin can use osnadmin channel join command to execute. Here’s the folder structure for the same, followed by an example showing how the command is used.
Folder Structure
/join_channel
|-- templates
|   |--_helpers.tpl
|   |-- join_channel.yaml
|   |-- configmap.yaml
|-- Chart.yaml
|-- values.yaml
How’s the command used:
osnadmin channel join -o orderer.example.com:9443 --ca-file $CA_FILE --client-cert $CLIENT_CERT --client-key $CLIENT_KEY --channelID mychannel --config-block mychannel-genesis-block.pbSimilarly, peer admins can run the peer channel command to perform channel operations.
Or run the following code to Join Channel
docker exec -e
"CORE_PEER_MSPCONFIGPATH=/etc/hyperledger/msp/users/[email protected]/msp"
peer1.org1.example.com peer channel join -b composerchannel_config.blockThe Fabric Chaincode Lifecycle
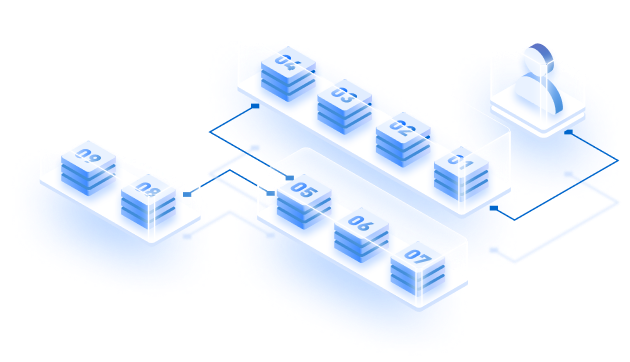
In the latest Fabric version updates; a new decentralized chaincode lifestyle process was introduced to mitigate the shortcomings of the previous install-instantiate and install-upgrade legacy method. This was replaced with a four-step model, as depicted in the diagram below.
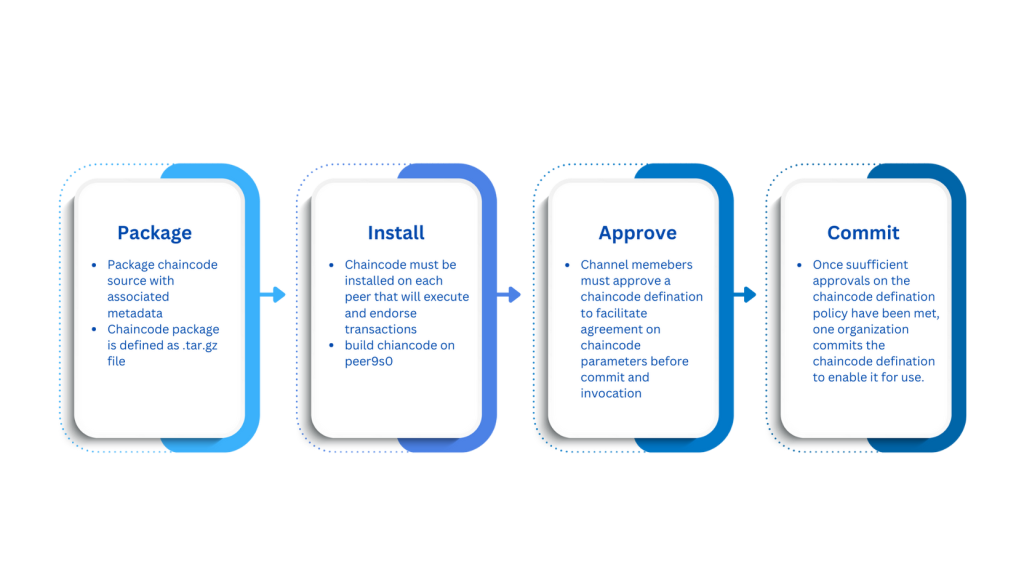
Step 1: Packaging
Packaging can be completed by one or each organization, and each chaincode package is defined as a .tar.gz file. As mentioned, you must package the chaincode in a tar file and install it on the peer node, and this package can be made using fabric peer binary. This package then endorses and executes transitions, and the installation is carried out using the admin’s peer CLI. Then, the peer creates the chaincode and returns if there are any errors.
Packaging the chaincode just once is recommended, and installing it to all the peers if the org has multiple peers.
Step 2: Installing
Chaincode must be installed once in each peer node so that it can be deployed to multiple channels if required.
After installation, you receive a chaincode package identifier, which can be used to deploy the chaincode on the channel. You can later fetch this identifier by running the command peer lifecycle chaincode queryinstalled
Or run this command to install Chaincode
composer network install -a device-network.bna -c PeerAdmin@multi_org1Click this link if you use chaincode as an external service.
Step 3: Approval
Chaincode definition governs the chaincode, and when a channel member approves this definition, the approval acts as an organization’s vote, on the chaincode parameters it accepts. Before the chaincode can be used, channel members are allowed by the approved definitions to agree to the said chaincode.
The command peer lifecycle chaincode queryinstalled can fetch the package identifier of the chaincode, and the command peer lifecycle chaincode approveformyorg will approve the definition.
Step 4: Committing
One organization can commit the chaincode definition to the channel after enough number of channel members have approved it. You can use the peer CLI command checkcommitreadiness to check if there are enough approvals available and use the command peer lifecycle chaincode commit once enough approvals are available.
Wrapping Up.
Collectively, we have covered all the crucial considerations and how to set up components for the Fabric network. We hope this helps you get one step closer to getting your Fabric blockchain network up and running.
Speaking of blockchains, Zeeve is a BaaS or a blockchain as an infrastructure platform that offers nodes, blazing fast APIs, and supports all major public and permissioned blockchain protocols.
Reach out to our experts or book a free session today and follow Zeeve on social media.


